Installing CodeSmith Generator
- Cody Smith (Unlicensed)
- Anonymous
Installing
The following section will go over how to download CodeSmith Generator, customizing the installation, and changing the samples directory.
Download
In order to download the latest CodeSmith Generator installer, just visit our download page. If you need a previous version, just send us an email and we will be happy to provide you with the download.
Once you have the CodeSmith Generator installer downloaded, double click on the icon to launch it. Depending on your settings, you may be presented with this window:
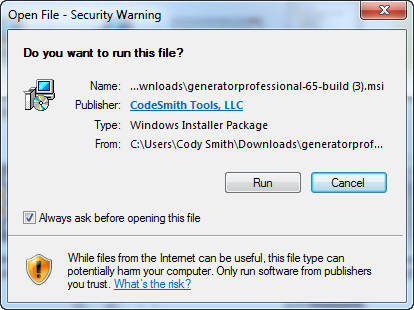
Before clicking run, please make sure that Visual Studio and previous versions of CodeSmith Generator are not running. If these programs are closed, click run to continue with the installation.
Customizing Your Setup
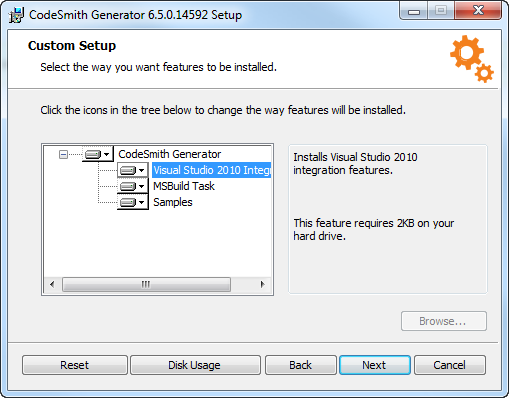
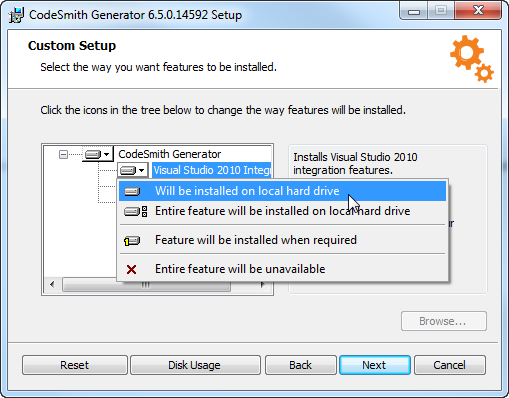
This window will allow you to customize which components of CodeSmith Generator you want to install. You can do this by clicking on the icon to the left of the component you want to change. You will be presented with the following options.
- Will be installed on local hard drive.
- This means the feature will be installed in your current default hard drive.
- Entire feature will be installed on local hard drive.
- This means that the parent and child features will be selected as "Will be installed on local hard drive".
- Feature will be installed when required.
- The feature will be installed when you perform an action that requires it.
- Entire feature will be unavailable.
- The selected feature won't be installed at all.
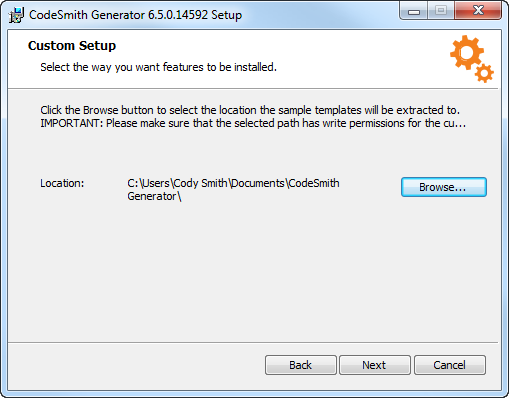
From the same window, you can also change the destination folder of CodeSmith Generator by clicking browse and selecting the file path you wish CodeSmith Generator to be placed. If you don't want to change any of these settings, just click next to continue with the default settings.
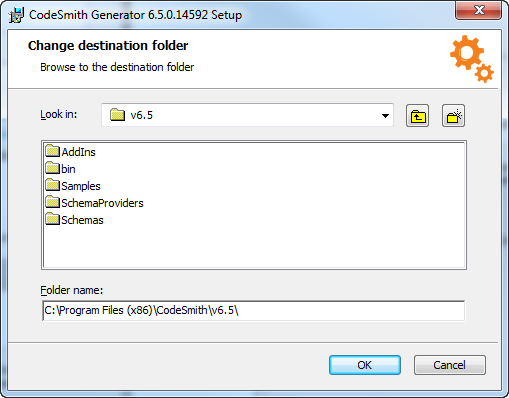
Changing The Samples Directory
After clicking next on the Custom Setup window, you will be presented with the below window.
By clicking browse in this window, you can change the file path you want your samples directory to be located in.
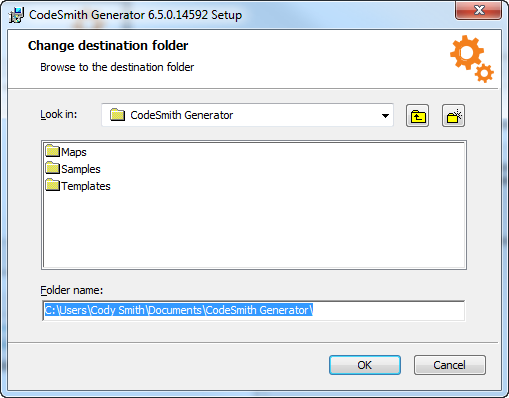
Please make sure that you have read/write permissions as the currently logged in user to the folder you're trying to set your samples directory to.