Changing CodeSmith Generator
- Cody Smith (Unlicensed)
Owned by Cody Smith (Unlicensed)
Last updated: Jun 13, 2012
Changing
In order to change currently installed features and components of CodeSmith Generator, you will either need to:
- Go to your control panel, select Uninstall a program, find CodeSmith Generator and click 'Change' at the top bar, or right click CodeSmith Generator and click 'Change'.
- Find your original CodeSmith Generator set up file and run it. If you deleted the set up file, you can download it here. If you need a previous version, please contact us via email.
Both of these options will bring you to this set up window.
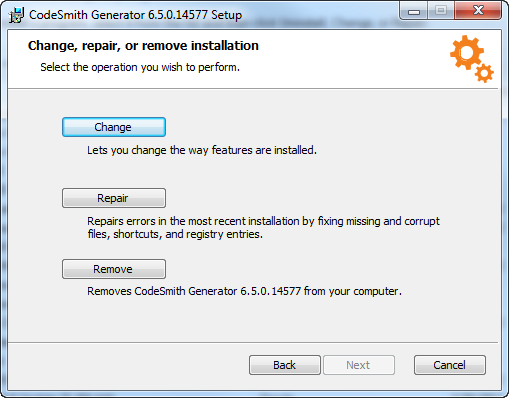
Click 'Change' to continue with editing your features.
From this window, you can:
- Reset - Resets all configurations to their default settings
- Disk Usage - Displays the current space available in all of your hard drives.
- Back - Brings you to the start page.
- Next - Continues with the changes with the current changes made.
- Cancel - Cancels the setup and closes the window.
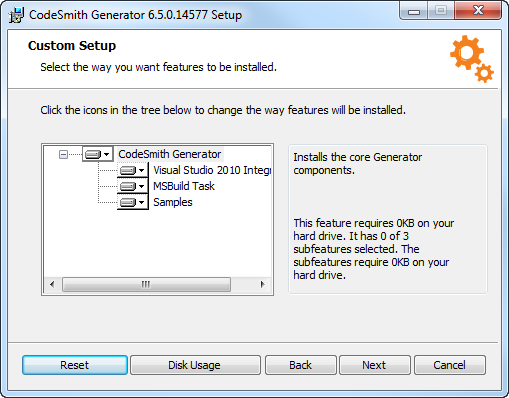
Customizing Your Setup
The previous window will allow you to customize which components of CodeSmith Generator you want to install. You can do this by clicking on the icon to the left of the component you want to change. You will be presented with the following options.
- Will be installed on local hard drive.
- This means the feature will be installed in your current default hard drive.
- Entire feature will be installed on local hard drive.
- This means that the parent and child features will be selected as "Will be installed on local hard drive".
- Feature will be installed when required.
- The feature will be installed when you perform an action that requires it.
- Entire feature will be unavailable.
- The selected feature won't be installed at all.
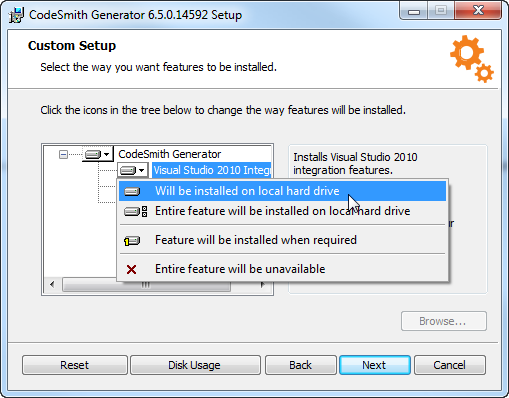
Click next after you have finalized your changes to finish the setup.
, multiple selections available,